In honor or our Countdown to Spring: Color Week, I wanted to create a DIY project that encompassed a few of my favorite things: One, these adorable woven containers that I purchased at IKEA a couple months ago. They have been sitting on my dresser, waiting for a makeover. Second, I wanted something with some inspiring Spring color. Last, I wanted an EASY project. This one only took about 30 min. The results are so fun... see for yourself.
Here is what you need:
Containers (I couldn't find them on the IKEA website otherwise I would have included a link, sorry)
Broken Crayons
Blow dryer or Iron
Wax paper
Here is what I did:
1. Soak the crayons in warm water to get the wrappers off
2. Cut the crayons into small pieces with a kitchen knife
3. Place the chopped color crayon pieces onto the container in the pattern you would like (keep in mind the colors will run when melted and take on a pattern of their own)
4. Place the wax paper over the pieces
5. Put blow dryer on high heat, low speed and hold close to the wax paper. If you are using an iron place on medium heat.
6. Watch the colors melt, when they are melted enough so that they sick to the container on their own without getting blown away you can remove the wax paper and continue melting.
7. You can move the liquified colors in different directions by moving the blow dryer.
Voila! You have your own, super cool and modern new container.
What do you think? Did you try it? Was it fun and easy? If you did try it, upload your photos to our Facebook page HERE, we would love to see what you came up with.
Showing posts with label Crafting. Show all posts
No green thumb needed: Fabric Flowers
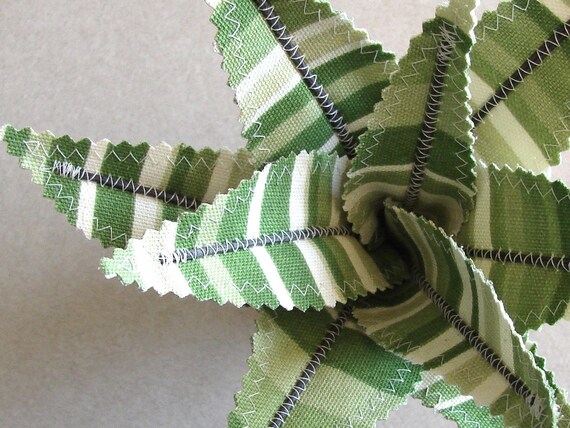
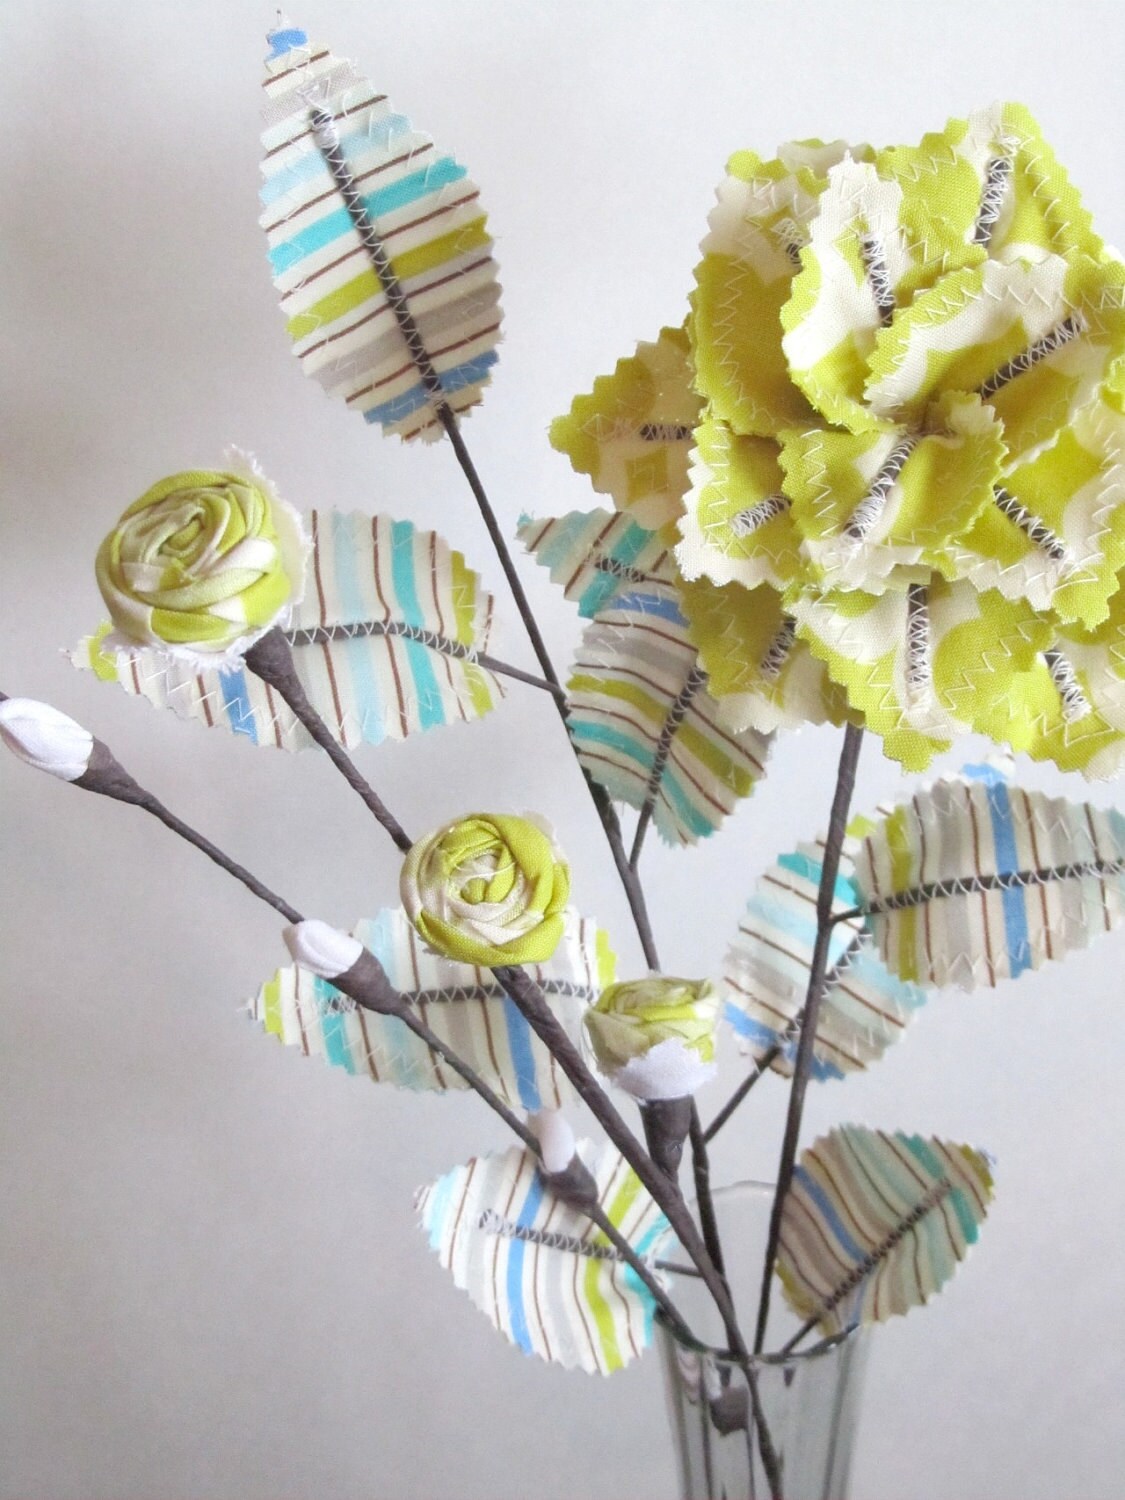
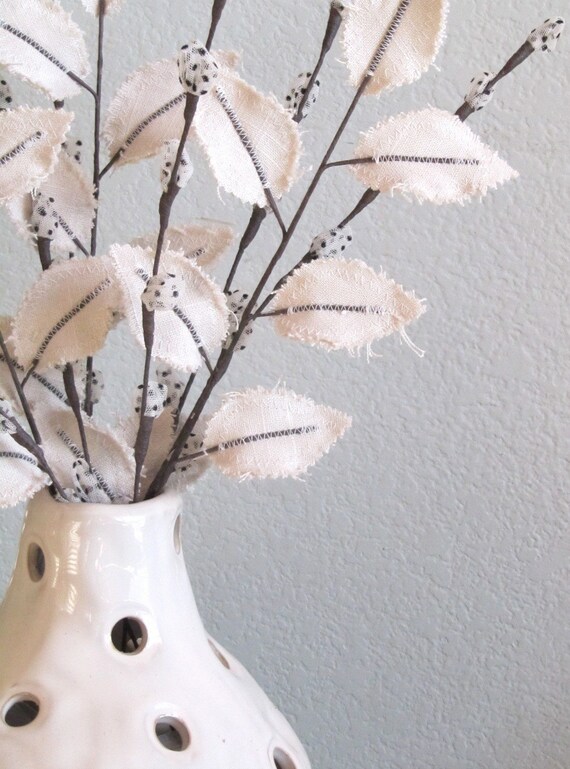
What a great concept, flowers that are beautiful and unique but need no sunlight or water. These flowers can be ordered in some of my all time favorites, aloe vera, pussy willow and leaves of all colors and patterns. The perfect accent for your antique vases. Find them at Jane Joss.
| Images via Jane Joss |
Do you know of a product that you would like to see featured here?
Are you looking for a special gift that we might be able to help you find?
Please contact Wind and Willow Home
Beauty Falling: A collection of handmade goodness falling from the sky
Today's post is inspired by a board I have been adding to over at Pinterest.com. With all of the rain we have been getting here in Minnesota I figured a little bit of beautiful inspiration falling from the sky was appropriate. Enjoy!
| Image via Ohdeedoh |
![]() |
| Image via Zemotion |
![]() |
| Image via The Canterbury Place |
| Image via Yuko Takada Keller |
| Image via Martha Stewart.com |
| Image via Hutch Studio |
| Image via designaside |
For more Ooooh, Ahhhh. follow me on Pinterest
Global Craft Party 2011 was a success at Etsy Labs.
Had the pleasure visiting New York City last week for the first time and a highlight was attending the Global Craft Party 2011 at Etsy Labs in Brooklyn. We took the blue line to the High St stop in Brooklyn and made the short walk to Etsy. We followed the signs and headed up the elevator. As we entered the space, we were a bit overwhelmed as we were 'fashionably late' and the scene was packed wall to wall with fellow crafters, eating, drinking and doing what we do best, being creative. The atmosphere, adorned with a plethora of crafting stations, supplies, decorations and a live jazz band, was jovial to say the least. Once we had a chance to scan the space we joined in on the festivities. We got photos in the photo booth, made buttons and mingled with the crowd.
Going into the night I had expected to do some crafting and maybe network with some artists hoping to gain new shops to feature here on this blog. I expected conversations such as "what do you do?", "do you have an Etsy shop?", and what do you sell?" but the packed space and the volume of the festivities made that a little difficult, which was ok! The highlight of the night for myself and my husband (who was such a great sport to join me for this event) was chancing a meeting with another couple, Audry and Denis. I chatted with Audry and Jordan (my husband) talked to Denis in the line for the photo booth (it was quite popular). Audry and I had a bit in common...including the fact that our husbands were wonderful enough to join us as we mingled with others who enjoy crafting as much as we do but also our backgrounds in design and the love for handmade pieces and the inspirations behind them. Our husbands also shared interests in crafts...craft brewing that is (a different blog for a different day). As the lights flashed to signal the party ending, the four of us continued our conversations at a couple watering holes in the Dumbo area of Brooklyn. They were nice enough to show us Brooklyn Bridge park and pointed us to the start of the bridge so we could walk it back to Manhattan. We appreciated their hospitality and we expect to stay in touch and hopefully meet up again in the future.
All in all, this party was everything and more than I had expected. It is these kinds of meet-ups that makes the crafting/handmade/art communities so special.
Going into the night I had expected to do some crafting and maybe network with some artists hoping to gain new shops to feature here on this blog. I expected conversations such as "what do you do?", "do you have an Etsy shop?", and what do you sell?" but the packed space and the volume of the festivities made that a little difficult, which was ok! The highlight of the night for myself and my husband (who was such a great sport to join me for this event) was chancing a meeting with another couple, Audry and Denis. I chatted with Audry and Jordan (my husband) talked to Denis in the line for the photo booth (it was quite popular). Audry and I had a bit in common...including the fact that our husbands were wonderful enough to join us as we mingled with others who enjoy crafting as much as we do but also our backgrounds in design and the love for handmade pieces and the inspirations behind them. Our husbands also shared interests in crafts...craft brewing that is (a different blog for a different day). As the lights flashed to signal the party ending, the four of us continued our conversations at a couple watering holes in the Dumbo area of Brooklyn. They were nice enough to show us Brooklyn Bridge park and pointed us to the start of the bridge so we could walk it back to Manhattan. We appreciated their hospitality and we expect to stay in touch and hopefully meet up again in the future.
All in all, this party was everything and more than I had expected. It is these kinds of meet-ups that makes the crafting/handmade/art communities so special.
![]() |
| Entry to Esty Labs |
![]() |
| Fellow Etsians packed the space |
![]() |
| True crafters work here |
![]() |
| A little of this |
![]() |
| A little of that |
![]() |
| crafting in progress |
![]() |
| button station |
![]() |
| Our photo booth pics being turned into buttons. |
A Memorial Day Thank You.
In honor of all those who have served, we remember: For your sacrifice for our freedom, to you and your families who maker our country what it is, a sincere and heartfelt THANK YOU. Let this day be celebrated in your honor.
I thought the gals at Party Blueprints put together a great Memorial Day party planning guide. Follow Dawn and Elizabeth for the details on a vintage penny candy bar, hot dog bar, patriotic pinwheel decorations and more.
Make it yourself Monday: Newspaper comics wreath tutorial
Today I wanted to do a tutorial for this fun and virtually free wreath I made from items I had around the house. It was inspired by a beautiful doily wreathe at The Red Thread. I originally had the idea to make it as a welcome home gift for a friend's baby boy. It turned out so stinkin' cute I had to make one for myself.
I started by collecting all the items I would need for this project.
1. Cardboard box
2. Some type of straight edge
3. Marker or pencil
4. Cutting utensil
5. Stapler (with staples of course)
6. Sunday Comics section from the newspaper (about 4 weeks worth)
7. 3 1/2" diameter square for template (I used a 16oz glass)
For Decoration:
1. Ribbon
2. Twig from tree (wooden dowel would work too)


Final touches: I finished this wreath off with some red and white striped ribbon that I had laying around. I couldn't find anything around the house to use as a hanger so I decided to take a look around the yard. I found this perfect twig on the ground and tied two pieces of the ribbon to that for an organic look. Simple, unique and virtually FREE.
Did you try it? If you have any tips for this project share them in the comments section below.
Share what you made! Send your pictures to me: email me at Wind and Willow Home Projects and I will feature your project.
I started by collecting all the items I would need for this project.
1. Cardboard box
2. Some type of straight edge
3. Marker or pencil
4. Cutting utensil
5. Stapler (with staples of course)
6. Sunday Comics section from the newspaper (about 4 weeks worth)
7. 3 1/2" diameter square for template (I used a 16oz glass)
For Decoration:
1. Ribbon
2. Twig from tree (wooden dowel would work too)
Making the frame: First I drew a square on one side of a cardboard box about 13" wide by 18" high with my straight edge. Next, I drew a smaller square about 9" wide by 14" high inside of the larger square. I cut both squares out, leaving about a 2.5" frame.
Cutting the newspaper circles: First I collected the Comics section from my local Sunday paper (about 4 weeks worth). Then I used the rim of a 16oz glass to trace a circle onto the newspaper. I finally cut out the circles.


Making the wreath: I started by folding each circle in half and then puckering it up creating a flower like shape (see photo above). I then started at the top corner of the cardboard frame and stapled the bottom point of the newspaper to the frame. Next, I continued to apply the newspaper circles going around the frame and overlapping the bottom stapled portion to hide the staples.
Did you try it? If you have any tips for this project share them in the comments section below.
Share what you made! Send your pictures to me: email me at Wind and Willow Home Projects and I will feature your project.
Make it yourslf Monday: Personalized toddler bed
Every night when I tucked by 3 1/2 year old into her bed I felt that there was something missing. Her bed (from Ikea) was just too stark and white/gray. The rest of her room has lots of color but when it came to her bed, the design just fell flat. I had never planned on painting the bed which is usually my go to idea for a cost effective transformation. Since she will not be in her toddler bed for much longer, I wanted something that wasn't permanent but added a lot of personality. Finally one day the light bulb went on, Ribbon! Simple, not permanent, and we were able to add lots of personality for a relatively low cost.
Here is what I did: I simply selected various sizes, colors and patterns of ribbon that I felt expressed my daughters personality and coordinated with her existing room decor. Next I cut the ribbon to a size that I felt, when tied, would hand down enough to look great but short enough that they wouldn't get in her way when sleeping or playing (of course I also made sure they were short enough so they could not harm her).
Finally, I tied them to the bed in a slip knot and put a small piece of glue under the knot so they wouldn't fall off.
*Always keep in mind that the project should be safe enough for your child's age and maturity level
![]() | ||
| Before |
Finally, I tied them to the bed in a slip knot and put a small piece of glue under the knot so they wouldn't fall off.
*Always keep in mind that the project should be safe enough for your child's age and maturity level
Make It Yourself Monday - Pendant Light
This project is unique in that anyone can make this great modern pendant look as professional as the picture, it is that straight forward. Follow these 10 simple steps to making your very own mini pendant that is sure to impress. Make it at Poppytalk.
Did you try it? If you have any tips for this project share them in the comments section below.
Share what you made! Send your pictures to me: email me at I want it! Projects and I will feature your project.
Hand Spun
Luxurious locks of angora and merino wool blends makes this yarn incredibly soft, yet lovely textured. Spun thick and thin this yarn will keep you warm and cozy as the temperature drops. This yarn is hand dyed in a variety of pastels and bright sunshine colors - sure to inspire creativity. Perfect for any knitting project. Find it at Magnolia Hand Spun.
Do you know of a product that you would like to see featured here?
Are you looking for a special gift that I might be able to help you find?
Please contact me here: I want it! - nature inspired
Make it yourself Monday - Geometric Tree Skirt
This Monday I had to post this stunning project for all of my quilter friends or aspiring quilters. I came across this amazing tree skirt and knew I had to share it. It might not be for beginners but if you are just starting to quilt and have some persistence it will be well worth it. Please follow these links for the instructions from Stitched In Color. How to make it part A. Part B.

Did you try it? If you have any tips for this project share them in the comments section below.
Share what you made! Send your pictures to me: email me at I want it! Projects and I will feature your project.

Did you try it? If you have any tips for this project share them in the comments section below.
Share what you made! Send your pictures to me: email me at I want it! Projects and I will feature your project.
Small, Fall Pleasures - LOCALLY MADE (MINNESOTA)
Array of rainbow felted acorns give life to your fall decor. Acorns signify patience, strength, and potential, making them a meaningful gift as well. Hand made with wet-felted wool roving into an acorn seed and fitted into a natural acorn cap by Lisa Jordan of Lil fish studios.
Make it yourself Monday - Home made paper
Making your own paper is not only fun it is also a great way to recycle all of your paper scraps. I have buckets and buckets of shredded junk mail that could be put to good use.
Now is also a good time to use your creativity to produce beautiful, one of a kind holiday cards or unique gift wrap . Follow these links for easy how-to instructions. Making paper in 10 easy steps, Paper making video
Subscribe to:
Posts (Atom)